Hello everybody, I hope you are having an incredible day today. Today, I will show you a way to prepare a distinctive dish, hyderabadi chicken dum biryani. It is one of my favorites food recipes. For mine, I’m gonna make it a bit tasty. This will be really delicious.
Hyderabadi Chicken Dum Biryani is one of the most favored of current trending meals in the world. It’s easy, it’s quick, it tastes yummy. It’s enjoyed by millions every day. Hyderabadi Chicken Dum Biryani is something that I have loved my entire life. They are nice and they look wonderful.
To begin with this recipe, we must first prepare a few components. You can cook hyderabadi chicken dum biryani using 21 ingredients and 7 steps. Here is how you can achieve that.
The ingredients needed to make Hyderabadi Chicken Dum Biryani:
- Make ready 750 gm chicken
- Make ready 1 1/2 kilo Extra long Basmati Rice
- Get 4 tbsp ginger garlic green chilli paste
- Take 1/2 cup yoghurt
- Take 1 lemon squeezed
- Take 1 1/2 tbsp garam masala powder
- Get as per taste Salt
- Make ready 1 1/2 tbsp kashmiri red chilli powder
- Prepare 2 teaspoon haldi powder
- Make ready 1/3 cup mustard oil
- Get 5-6 tbsp Shahi Biryani Masala powder
- Make ready 1 bowl mint leaves
- Prepare 1/2 bowl coriander leaves
- Prepare 2 pieces Javitri, star anise
- Take 1/2 cup lukewarm milk
- Get 1 bit of kesar
- Get 1 pinch Yellow/orange food colour
- Take 5 drops kewra essence
- Take 3 drops mitha itar
- Get 10-12 onions finely chopped for birista
- Get as required All-purpose wheat dough for dum
Steps to make Hyderabadi Chicken Dum Biryani:
- First step: - Marinate the chicken overnight. Here I took 750 grams chicken. So I put 4tbsp garlic-ginger-green chilli paste, 1/2 cup yoghurt, 1 lemon juice, 1 and half tbsp garam masala powder, salt as per taste, 1 and half tbsp kashmiri lal mirch powder, 2 teaspoon haldi powder, 1/3 cup mustard oil, 3½tbsp shahi biryani masala powder, 1 small piece javitri, 1 bowl of mint leaves and 1/2 bowl of coriander leaves. Then let it rest overnight or for 4 to 5 hours maximum in refrigerator
- Second step: - take 1/2 cup lukewarm milk and add 2 pinches of Kesar in it. Also add just 3 drops of Kewra essence in the kesar milk and Yellow/orange food colour in the kesar milk. Keep the mitha itar ready too (separately). Also fry sufficient onions until they turn golden brown (I.e Birista). Keep all this ready before proceeding further
- Third step: - Soak extra long Basmati rice India gate by adding 1 Big elaichi, 2 small elaichi, 4 Cinnamon sticks, 10 whole black peppercorns, 1 piece javitri, 1 star anise, 5-6 cloves. Let it rest for 1.5 hours. - Then boil the rice by adding a bit more water. Also add salt while boiling. The salt should be a bit more as the water will be ultimately drained out.
- Remember the rice should not be entirely cooked. Just switch off the flame after the water comes to two boils. The rice should only be 70% cooked, not entirely. - After that add cold water immediately and drain all the water. Cold water is added so that the rice doesnt get stuck to each other.
- Fourth step: - In a container add ghee at the base and then place marinated chicken entirely. Add half boiled aloo (optional). The base should get covered by chicken and aloo entirely. Then add most of the Birista (and keep some for garnishing later). Now comes the first layering of rice. Start layering the rice and add a bit of kesar milk (I.e with yellow food colour and kewra), sprinkle a bit of mitha itar sprinkle 1 teaspoon of biryani masala. Prepare the second layer in that way too.
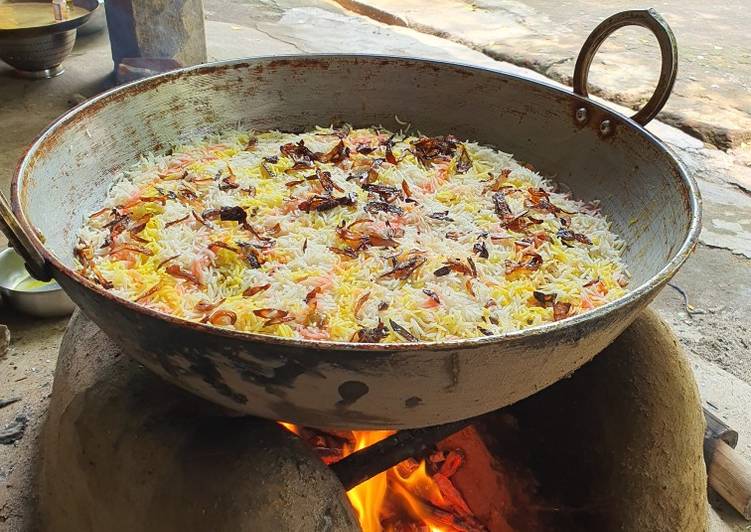
- Make the second layer of rice, sprinkle a bit of mitha itar, kesar milk again that has yellow food colour and kewra, sprinkle 1 teaspoon of biryani masala. Then finally add all the birista on the top of the rice and 2 tbsp ghee. - After that cover the lid with a container and seal the sides with atta dough so that air can't pass. - Now cook the biriyani in medium low flame for 15 mins and then place a tawa on the stove, place the biryani container on the tawa and cook in low flane for 45 mins
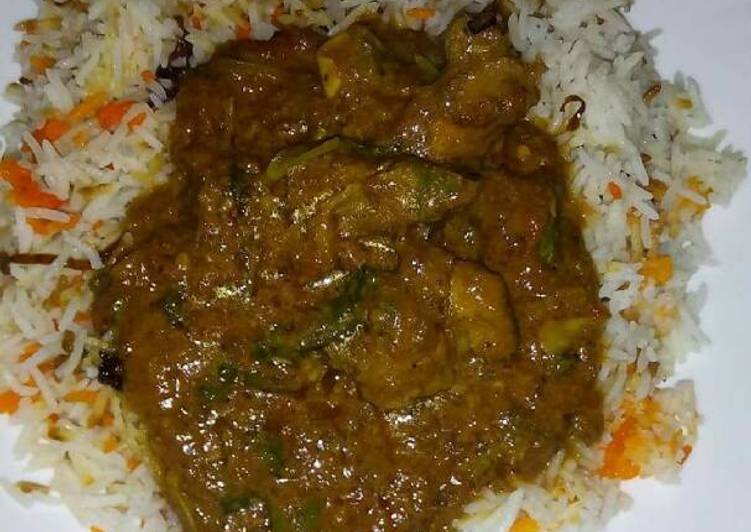
- I had Chulha as you can see in the picture so I did not place any tawa I just reduced the flame. Switch off the stove and dont open the lid for 10 mins. - Open the lid now. Your hyderabadi dum chicken biryani is ready😍😍
So that’s going to wrap it up for this special food hyderabadi chicken dum biryani recipe. Thanks so much for reading. I am confident that you can make this at home. There’s gonna be more interesting food at home recipes coming up. Don’t forget to save this page on your browser, and share it to your loved ones, colleague and friends. Thank you for reading. Go on get cooking!